|
Assorted bikes
-mostly
repairs - some recores & modifications

Probably once a month someone brings a radiator
in for a mate who is still laid up ! I know what that
feels like, many years ago I spent 11 months off work with a triple
compound fracture of my right leg - from a simple accident off my Yamie.
|
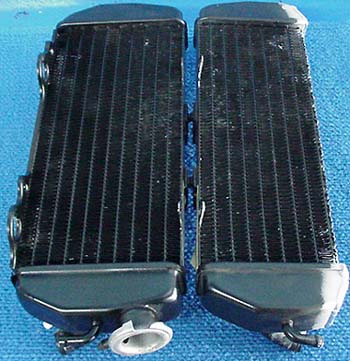
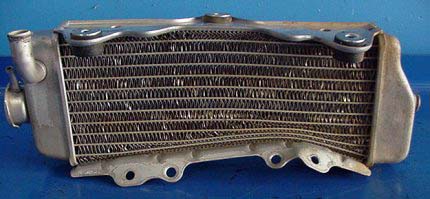
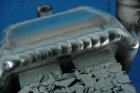
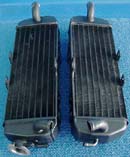
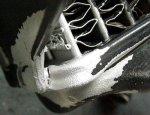
Darryl Pearce from central Queensland sent his two KTM radiators down
for us too section a piece off the side of both cores, so he could fit a
large long range Enduro fuel tank. We have already modified the radiator
on the right.
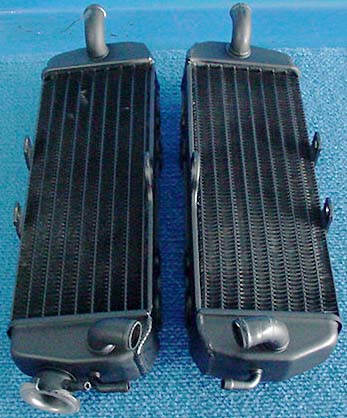
This was really tricky welding as the arc could easily jump from the
seam, the 2.5mm distance onto the tube, which has a wall thickness of
only 0.25mm (0.010") . If this happened, then it would melt a hole in
the tube the size from a pin prick to a match head !
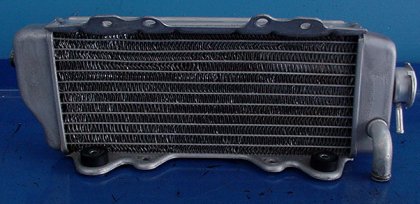
This is what the finished pair looked like. Hard to see what we did.
Much cheaper than buying two new radiators.
|
|

|
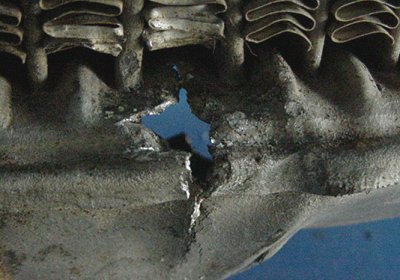
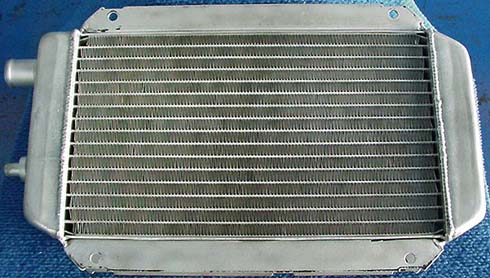
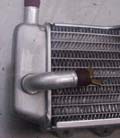
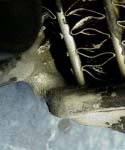
This is how you don't want your Radiator too look, but it's the state
allot of bike radiators are in when they are brought in & tested. The
leak at the end of the blue arrow would probably take around 20mins of
riding to empty the system & could be topped up every 15 mins. to get
home or back to the trailer/ute. It is best to only screw the cap on to
the first notch. You will feel it hard to turn, go easy & then get hard
again. Leave it in the easy part for two reasons. First it will only
hold a couple of pound in the system & so take allot longer to empty &
secondly & most important, there will not be enough pressure to blow up
in your face (can cause serious burns) when you undo it to refill. Still
be very careful & use some sort of rag over the cap though! The leak at
the end of the red arrow, would take around two minutes to empty the
system. This test was performed @ 18 psi.
It's very hard to see the water in the test tank, but this is the
radiator after we repaired it & is being held 12cm under water.
This is how you want your radiator too look all the time!.
|

|
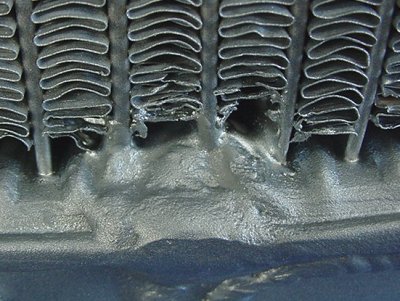
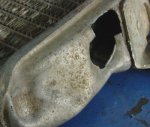
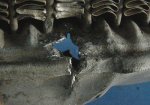
This is the worst repair we've had to do. If it hadn't been such an
expensive radiator & had to come from Italy, then I would've sacked it
when it came through the door. The angle the radiator is laying back on
doesn't let you see the true angle the whole side of the core was bent
up, unfortunately - like 30%. Bottom tank was smashed in, had a small &
a large hole torn out of it. The top tank was bent up & cracked.
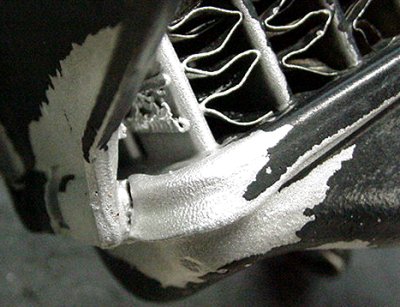
This is the piece that was torn out of the bottom tank & how the tank
was smashed in & up. A big hit.
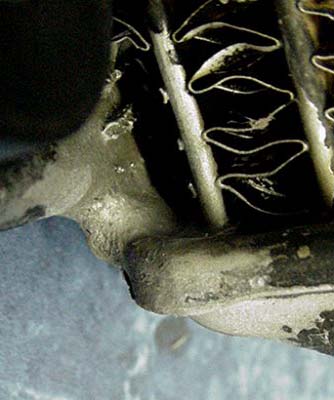
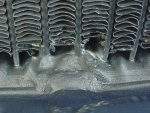
This is the hole another radiator shop melted out trying to do a
repair that was way beyond there capability. You can see a piece is
missing out of the other side of the tank & there must've been a big
stress fracture that opened up as soon as they put heat on it. The
radiator has too be straightened first to take as much stress out of it
as possible.
This is our repair. Pretty ugly - BUT - that alloy in the pic above
has been absolutely fried ! Way too much heat. We didn't have any solid
alloy to work off & so I had to keep chasing weeps from tiny cracks that
spread. Much easier, cheaper, neater, if we had of got to it first.
Patched up, pretty straight, all fittings in there place, pressure
tested to 20 psi., ready to spend a few hours straightening the fins &
then back onto the bike. A full days work here.
|
|
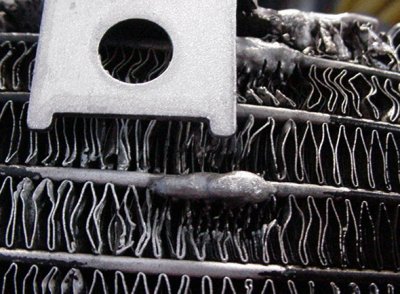
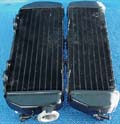
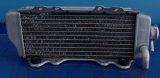
This is a curved super bike radiator & very expensive. We had to
hydrogen braze over two damaged tubes, patch & TIG weld the mount
bracket back on to the top band. The top section of the radiator was
battered about.
|
|
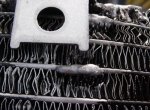
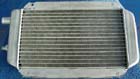
This is the most common repair we get in. The bike has been dropped on
it side, putting a small twist & curve into the core. This damage or
when we straighten the core will usually crack the side band/header
plate/tank joint. The three components have a common bond & so it is the
strongest part of the radiator as the thickness 2.0mm/1.4mm/1.4mm. The
job becomes extremely touchy when the crack extends across towards the
middle of the core, because of the high amount of heat needed to melt
the thick joint, can often melt the side out of the 0.36mm tube wall.
If the tube/header plate joint cracks, then it's a harder repair as
it's a 0.36mm tube wall to 1.4mm joint & it's sooo easy to melt the side
out of the tube.
This is the Hydrogen braze ready to straighten the fins & a coat of
paint.
|

|
11 / 02
Metro Yamaha sent this over for repair. It is one of the worst we
have done. We had to straighten the core first 7 then examine the
tube/header plate joint for excess stretching or cracking. It was okay.
We use a variety of jigs to straighten the cores depending on type of
damage.
Ready for a few more fins straightened & then sent back for 1/4 price
of new one. As of 01 / 04 this radiator still is in service.
|
|
This radiator was corroded from mixed inhibitors which weakened it to
the extent that when the bike fell off the stand, it cracked a tube.
Luckily, when we tested the radiator, we were lucky enough to notice a
tiny bubble on another tube. Increasing the pressure 5lb opened up
another 3 weeps, so we had to recore the radiator.
|
|